 打包和部署
打包和部署
# 本地环境打包预览
pnpm preview:build
# 预发布打包
.env.staging (opens new window) 文件为预发布打包前的配置文件,预发布 (opens new window) vite文档
pnpm build:staging
# 正式环境打包
.env.production (opens new window) 文件为正式环境打包前的配置文件
pnpm build
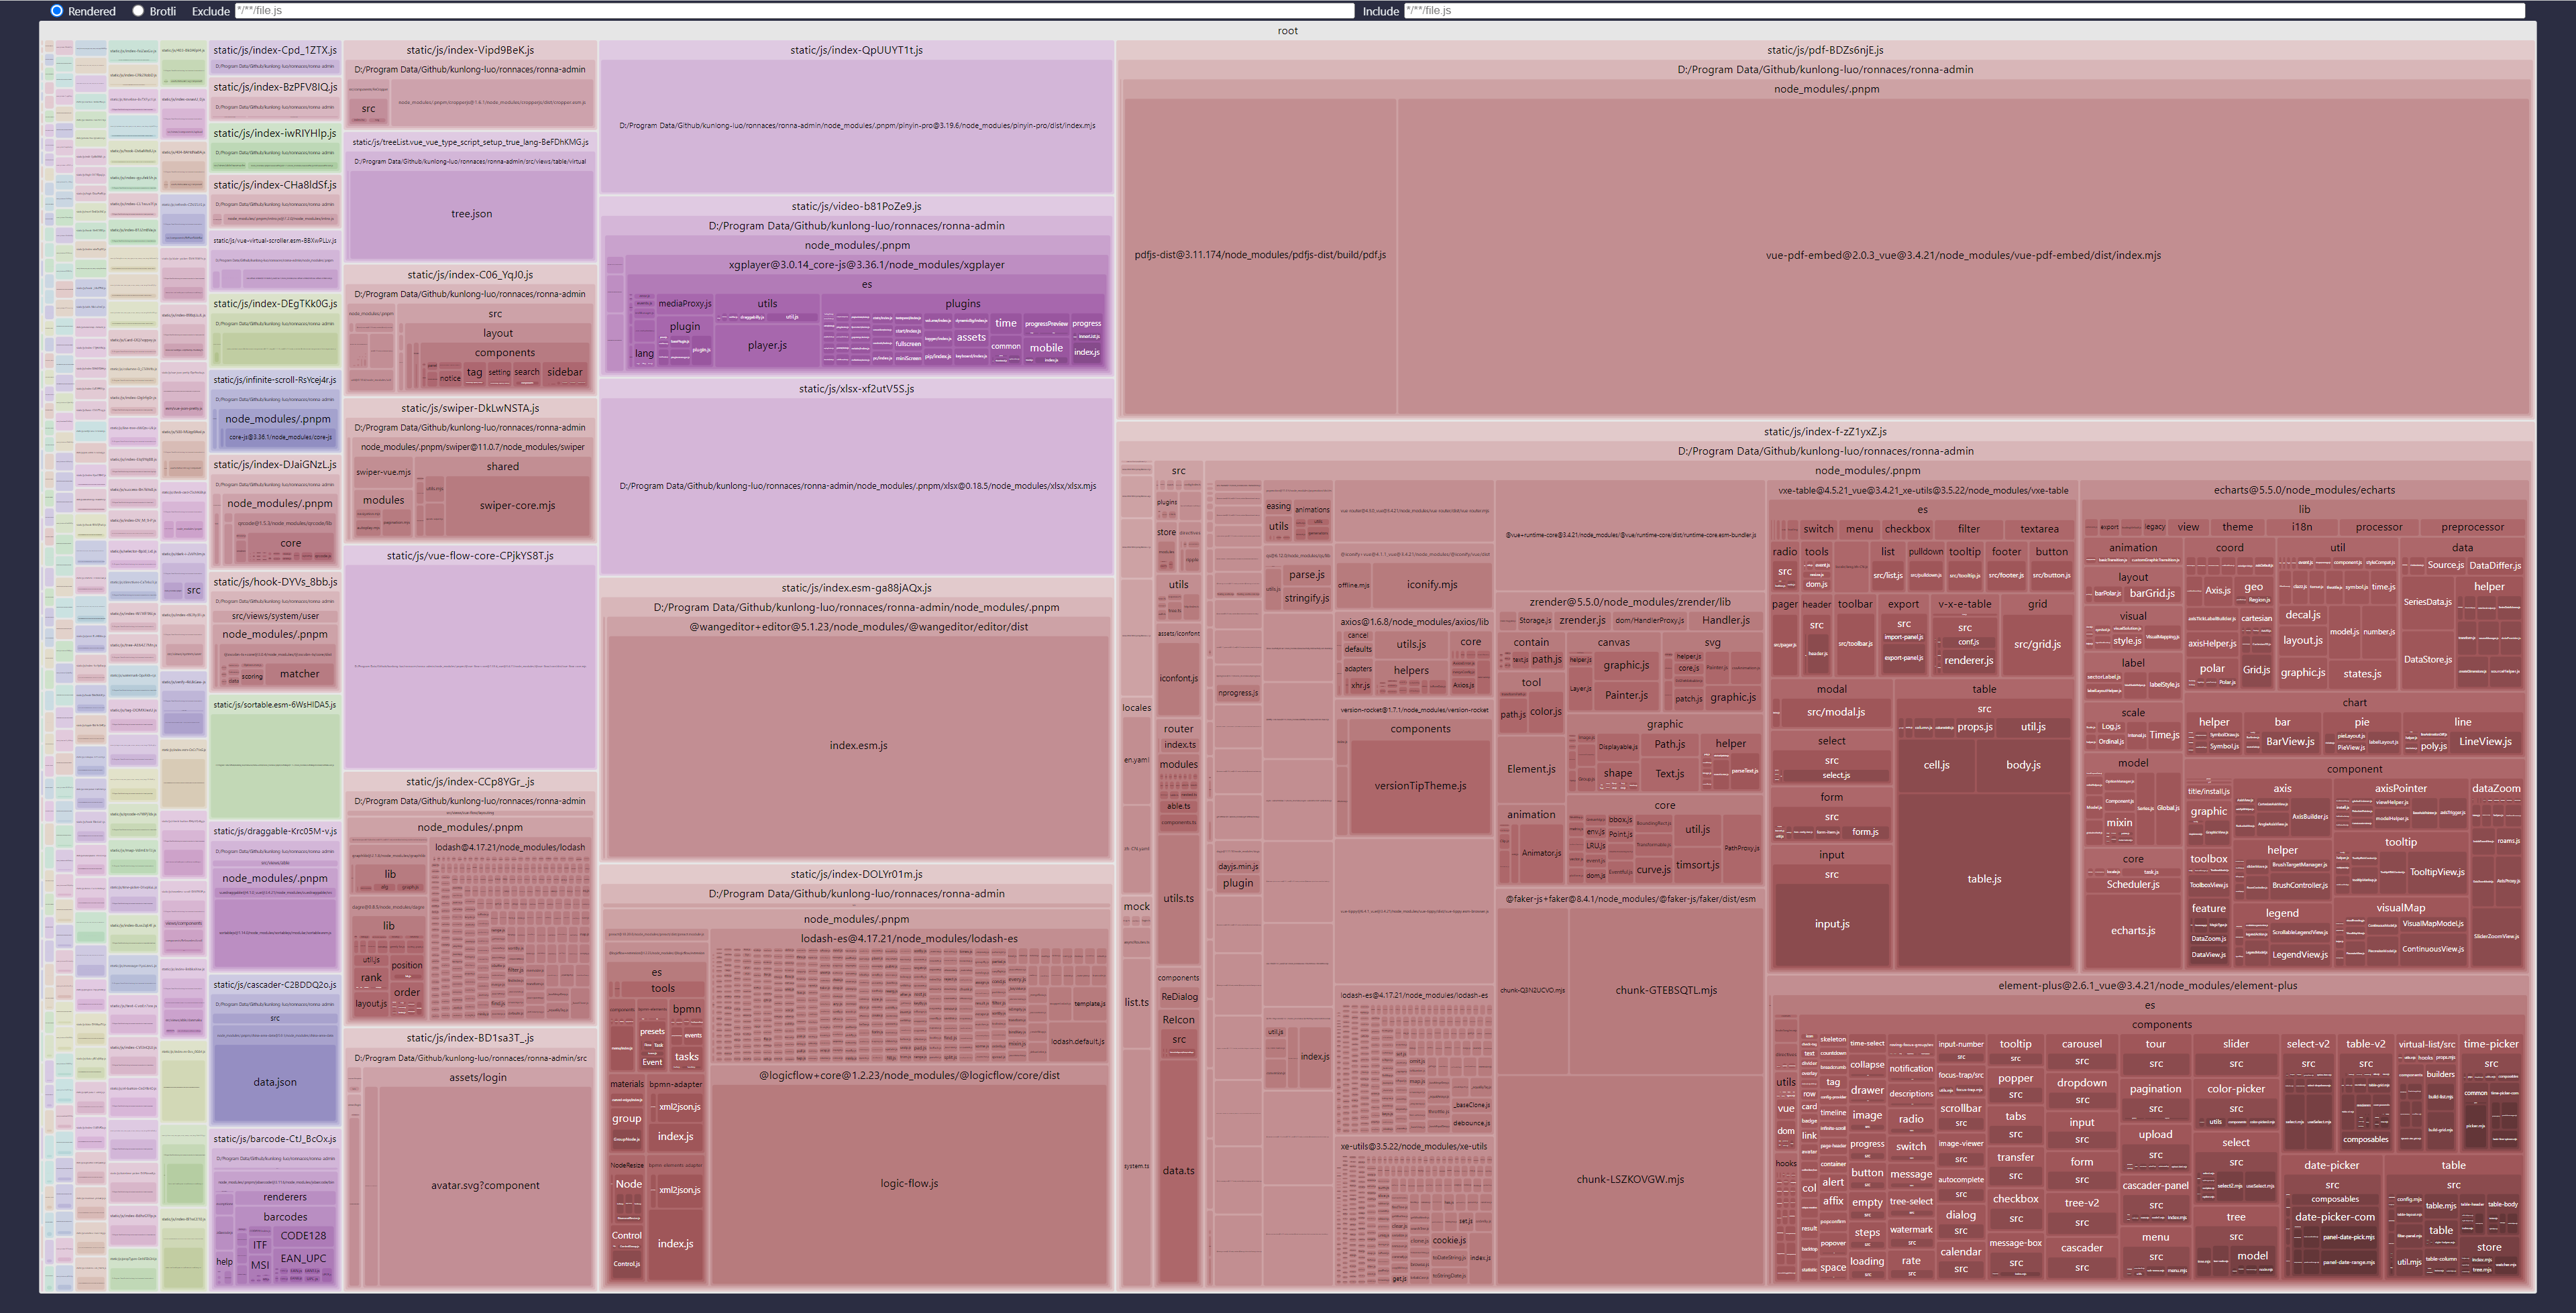
# 打包分析
pnpm report
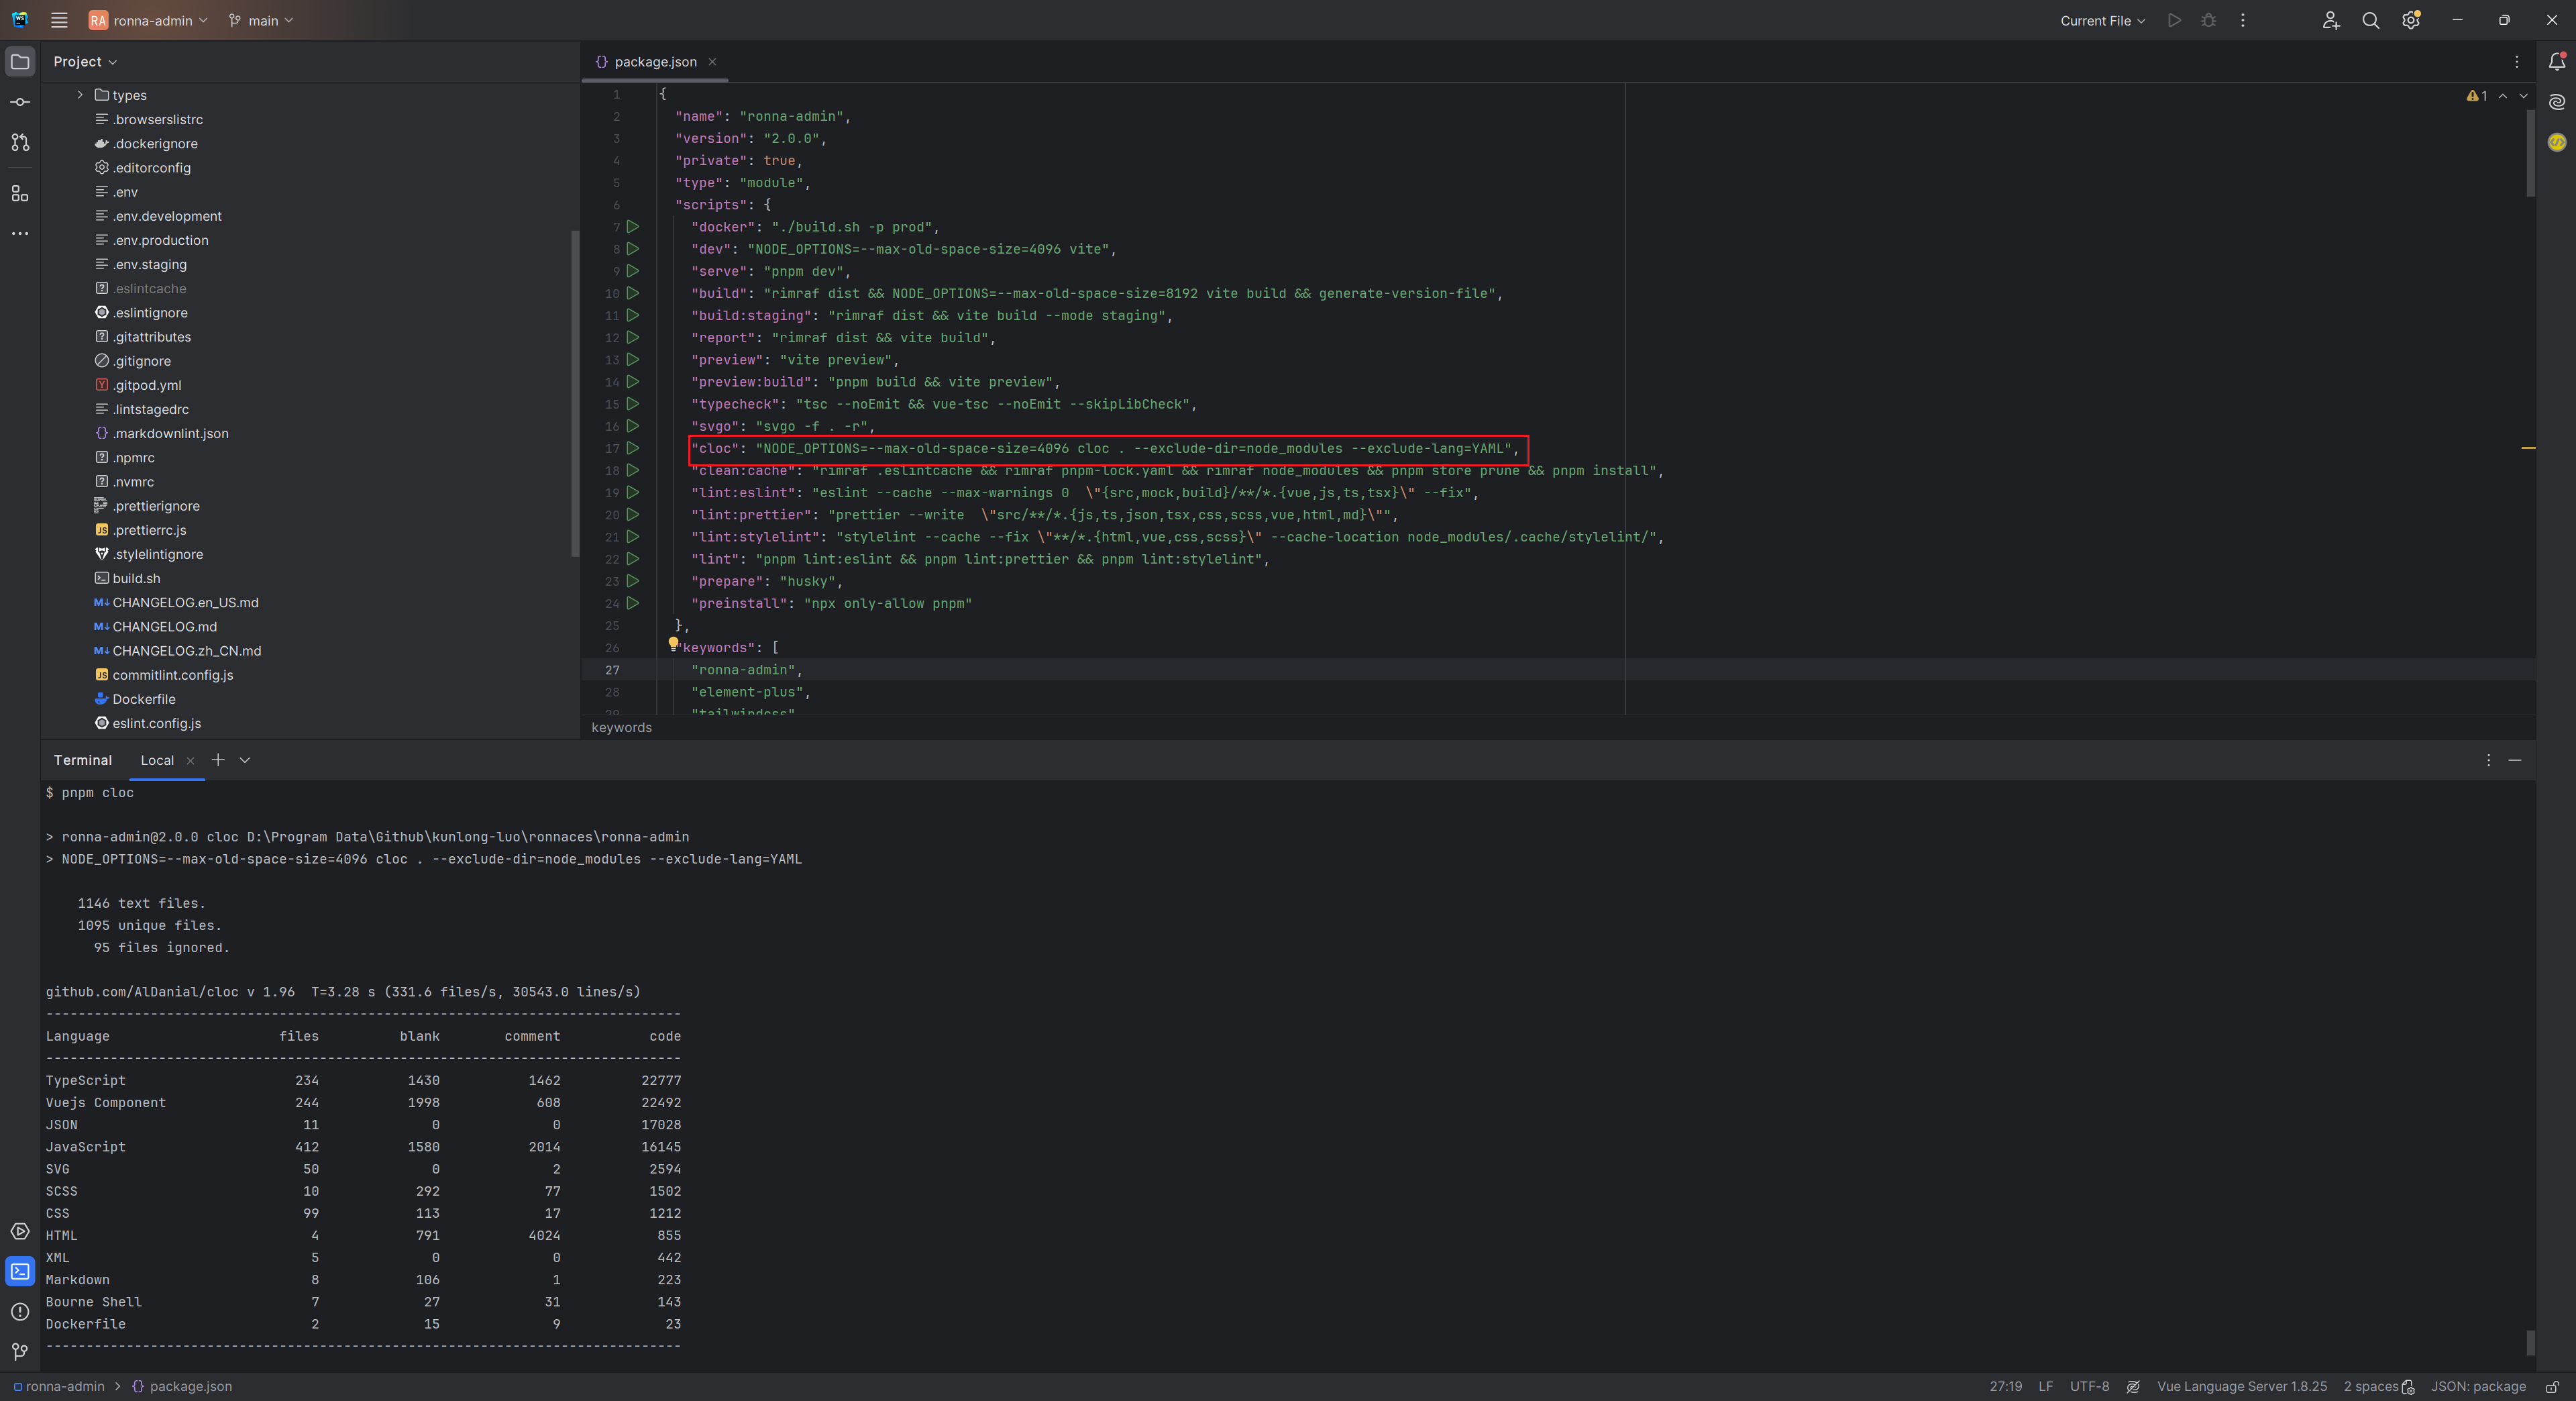
# 平台文件、语言分析
分析平台采用了哪些语言以及代码量
pnpm cloc
打包优化
点击查看更多 打包优化
# 部署
# nginx
在 http 请求篇,平台主推使用 nginx 部署,因为可以满足绝大多数场景,下面我们讲一下如何配置
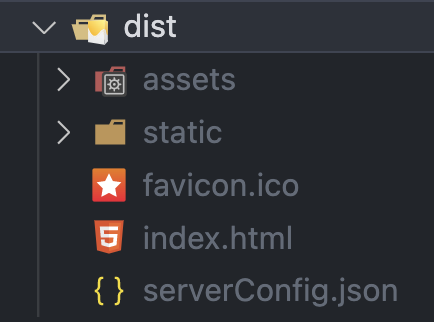
# 打包
平台提供了全局打包路径 VITE_PUBLIC_PATH (opens new window) ,默认 /,可根据需求自行修改。比如平台的预览地址是 https://github.com/ronnaces/ronna-screen/#/login,可以看到根目录 https://github.com/ronnaces 后面又跟了个 /ronna-screen/ 子目录,那么我们打包时就应该把 VITE_PUBLIC_PATH 改成 /ronna-screen/,然后执行 pnpm build 就行,打包完后观察平台根目录会多出个 dist 目录,如下图
# nginx 配置
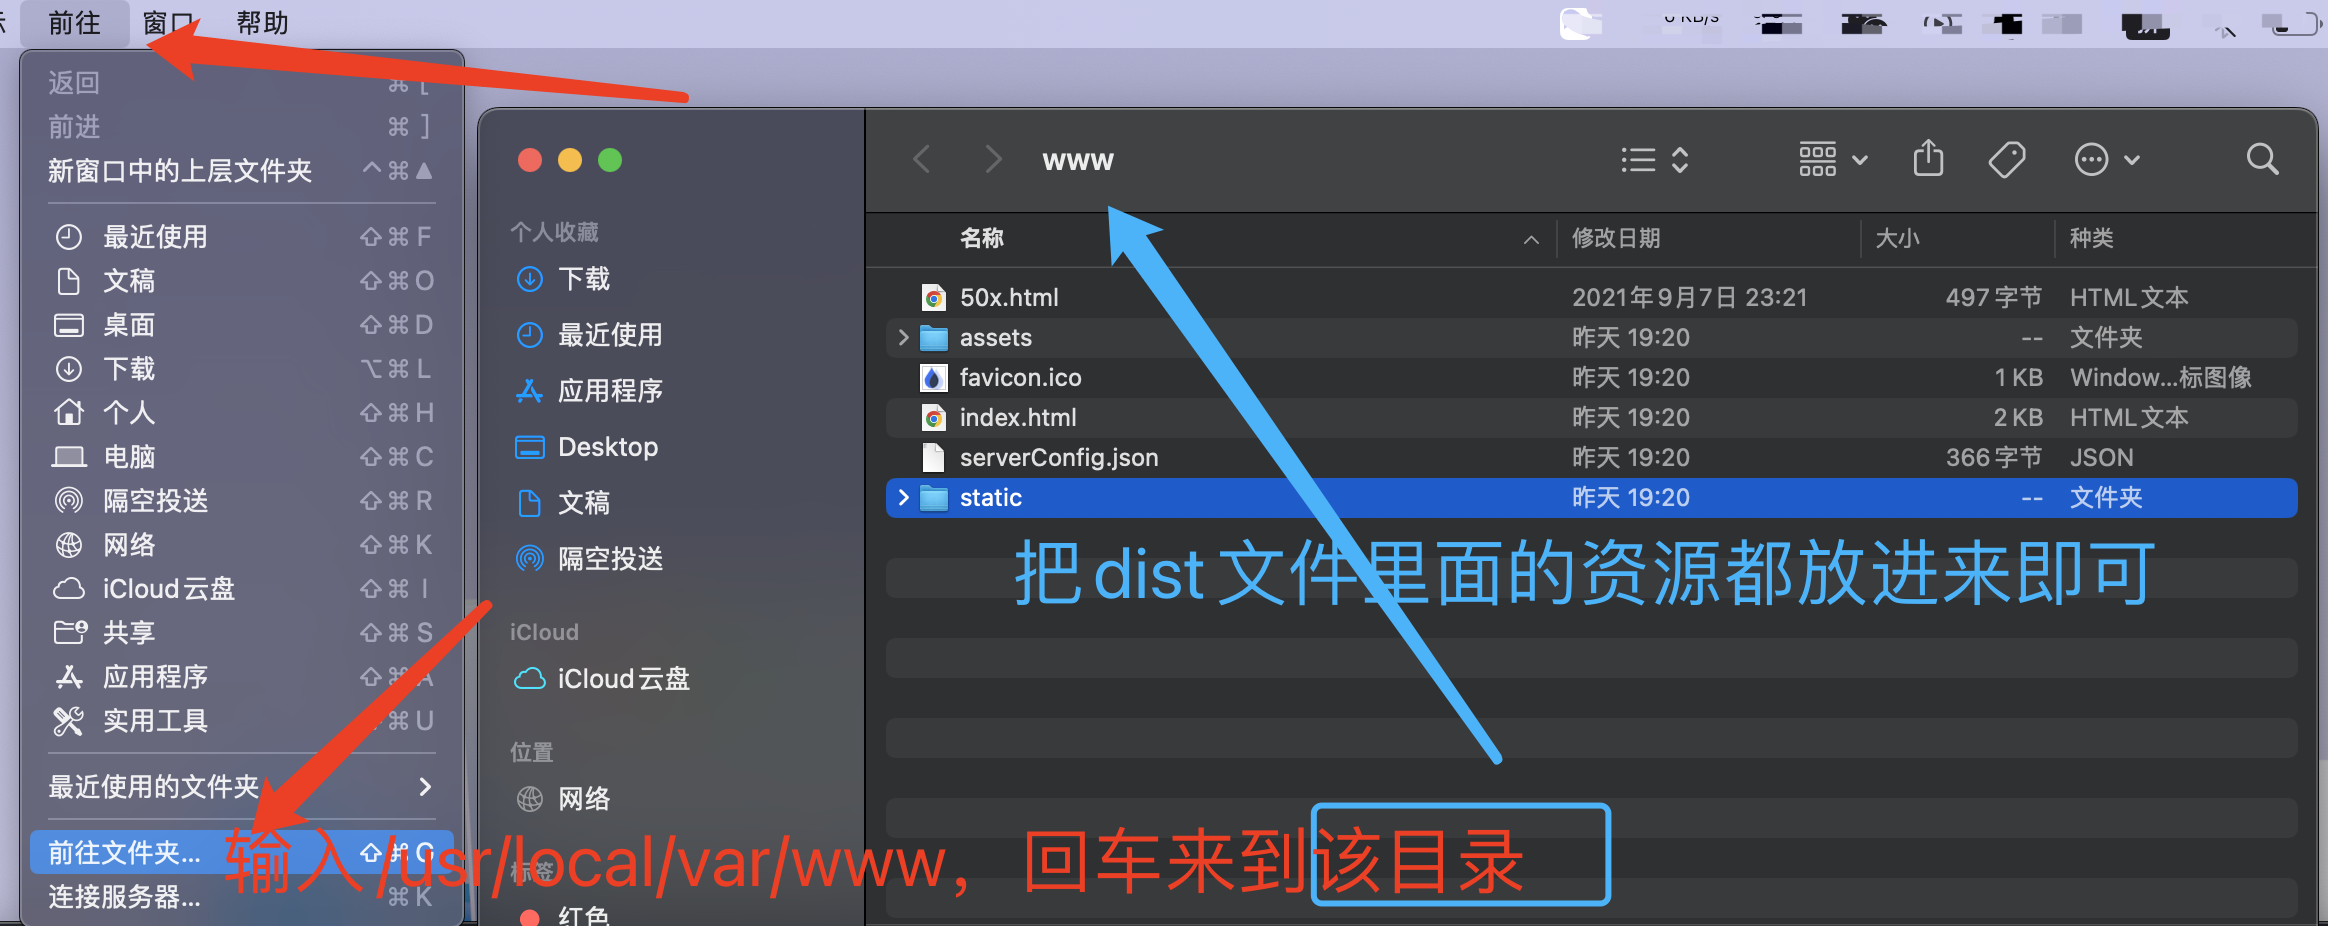
拿 mac 举例,配置都一样,可能您们对应的目录不一样,根据实际情况修改即可
① 上面打包好后,来到 /usr/local/var/www 目录下,将打包后 dist 文件里的静态资源都放进去即可,如下图
② 比如我们在 vite.config.ts 配置了两个后端地址,如下
proxy: {
  // 第一个代理后端地址
  "/api": {
    target: "http://127.0.0.1:3000",
    changeOrigin: true,
    rewrite: path => path.replace(/^\/api/, "")
  },
  // 第二个代理后端地址
  "/otherApi": {
    target: "http://127.0.0.1:3290",
    changeOrigin: true,
    rewrite: path => path.replace(/^\/otherApi/, "")
  },
}
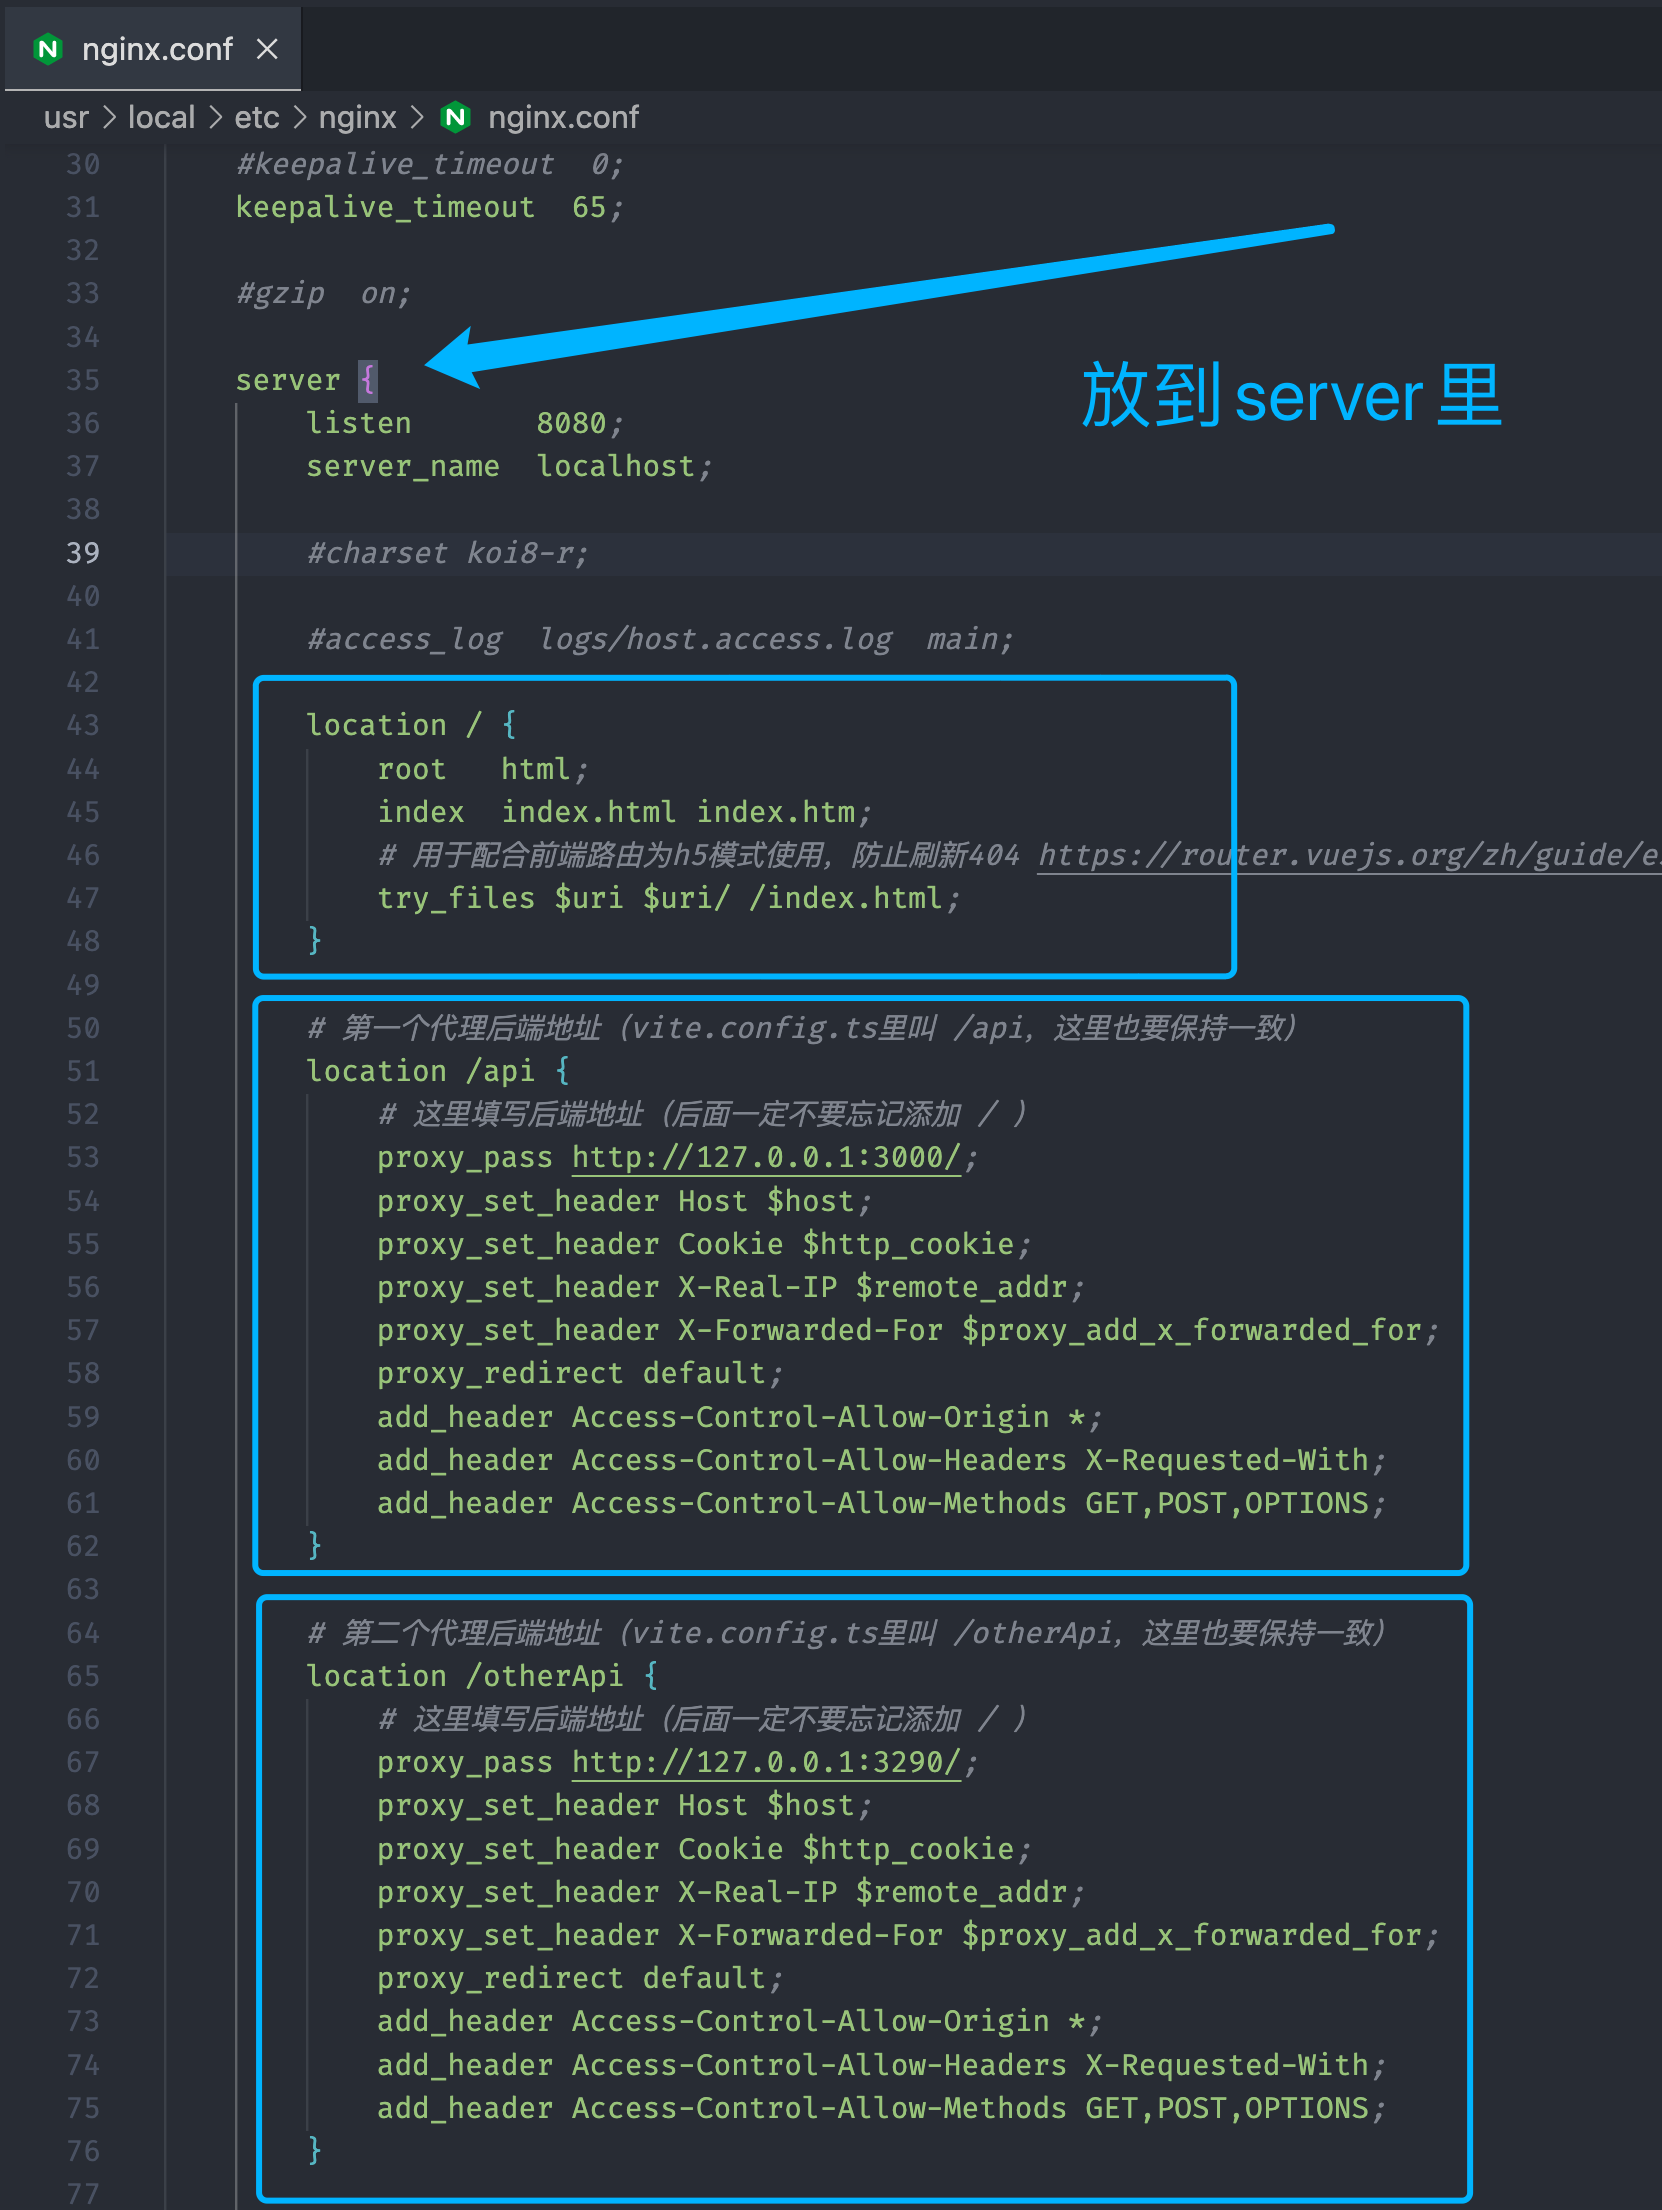
来到 /usr/local/etc/nginx/nginx.conf 这个 nginx 的配置文件,修改成如下配置即可
nginx.config
location / {
    root   html;
    index  index.html index.htm;
    # 用于配合前端路由为h5模式使用,防止刷新404 https://router.vuejs.org/zh/guide/essentials/history-mode.html#nginx
    try_files $uri $uri/ /index.html;
}

# 第一个代理后端地址(vite.config.ts里叫 /api,这里也要保持一致)
location /api {
    # 如果后端在本地比如127.0.0.1或者localhost请解开下面的rewrite注释即可
    # rewrite  ^.+api/?(.*)$ /$1 break;
    # 这里填写后端地址(后面一定不要忘记添加 / )
    proxy_pass http://127.0.0.1:3000/;
    proxy_set_header Host $host;
    proxy_set_header Cookie $http_cookie;
    proxy_set_header X-Real-IP $remote_addr;
    proxy_set_header X-Forwarded-For $proxy_add_x_forwarded_for;
    proxy_redirect default;
    add_header Access-Control-Allow-Origin *;
    add_header Access-Control-Allow-Headers X-Requested-With;
    add_header Access-Control-Allow-Methods GET,POST,OPTIONS;
}

# 第二个代理后端地址(vite.config.ts里叫 /otherApi,这里也要保持一致)
location /otherApi {
    # 如果后端在本地比如127.0.0.1或者localhost请解开下面的rewrite注释即可
    # rewrite  ^.+otherApi/?(.*)$ /$1 break;
    # 这里填写后端地址(后面一定不要忘记添加 / )
    proxy_pass http://127.0.0.1:3290/;
    proxy_set_header Host $host;
    proxy_set_header Cookie $http_cookie;
    proxy_set_header X-Real-IP $remote_addr;
    proxy_set_header X-Forwarded-For $proxy_add_x_forwarded_for;
    proxy_redirect default;
    add_header Access-Control-Allow-Origin *;
    add_header Access-Control-Allow-Headers X-Requested-With;
    add_header Access-Control-Allow-Methods GET,POST,OPTIONS;
}
将上面的配置放到 server 里,如下图
上面的配置是平台的 VITE_PUBLIC_PATH = / 情况,也就是只有跟目录的情况。下面的配置为有子目录情况,比如子目录叫 `ronna-screen`
① 来到 .env.production (opens new window),将 VITE_PUBLIC_PATH 等于 /ronna-screen,如下
# 线上环境平台打包路径
VITE_PUBLIC_PATH = /ronna-screen/
② 配置 nginx.config 如下,可以看到多了个 location /ronna-screen/ 配置
nginx.config
点击查看
location / {
    root   html;
    index  index.html index.htm;
    try_files $uri $uri/ /index.html;
}

location /ronna-screen/ {
    root   html;
    index  index.html index.htm;
    try_files $uri $uri/ /ronna-screen/index.html;
}

location /api {
    # 如果后端在本地比如127.0.0.1或者localhost请解开下面的rewrite注释即可
    # rewrite  ^.+api/?(.*)$ /$1 break;
    # 这里填写后端地址(后面一定不要忘记添加 / )
    proxy_pass http://127.0.0.1:3000/;
    proxy_set_header Host $host;
    proxy_set_header Cookie $http_cookie;
    proxy_set_header X-Real-IP $remote_addr;
    proxy_set_header X-Forwarded-For $proxy_add_x_forwarded_for;
    proxy_redirect default;
    add_header Access-Control-Allow-Origin *;
    add_header Access-Control-Allow-Headers X-Requested-With;
    add_header Access-Control-Allow-Methods GET,POST,OPTIONS;
}

location /otherApi {
    # 如果后端在本地比如127.0.0.1或者localhost请解开下面的rewrite注释即可
    # rewrite  ^.+otherApi/?(.*)$ /$1 break;
    # 这里填写后端地址(后面一定不要忘记添加 / )
    proxy_pass http://127.0.0.1:3290/;
    proxy_set_header Host $host;
    proxy_set_header Cookie $http_cookie;
    proxy_set_header X-Real-IP $remote_addr;
    proxy_set_header X-Forwarded-For $proxy_add_x_forwarded_for;
    proxy_redirect default;
    add_header Access-Control-Allow-Origin *;
    add_header Access-Control-Allow-Headers X-Requested-With;
    add_header Access-Control-Allow-Methods GET,POST,OPTIONS;
}
# 开启 gzip、brotli 压缩
① 来到 .env.production (opens new window),将 VITE_COMPRESSION 等于 both,如下
# 同时开启 gzip 与 brotli 压缩
VITE_COMPRESSION = "both"
② 配置 nginx.config 如下
nginx.config
http {
  # 开启gzip
  gzip on;
  # https://blog.csdn.net/fxss5201/article/details/106535475
  gzip_static on;
  gzip_proxied any;
  # 低于1kb的资源不压缩
  gzip_min_length 1k;
  gzip_buffers 4 16k;
  gzip_comp_level 2;
  # 需要压缩的类型
  gzip_types text/plain application/javascript application/x-javascript text/css application/xml text/javascript application/x-httpd-php image/jpeg image/gif image/png;
  # 配置禁用gzip条件,支持正则。此处表示ie6及以下不启用gzip(因为ie低版本不支持)
  gzip_disable "MSIE [1-6]\.";
  # 是否添加“Vary: Accept-Encoding”响应头
  gzip_vary off;

  # 开启brotli压缩,与gzip共存不会冲突,nginx默认不支持ngx_brotli模块,需要自行编译,参考 https://cloud.tencent.com/developer/article/2071894
  brotli on;
  brotli_comp_level 6;
  brotli_buffers 16 8k;
  brotli_min_length 20;
  brotli_types text/plain text/css application/json application/x-javascript text/xml application/xml application/xml+rss text/javascript application/javascript image/svg+xml;
}
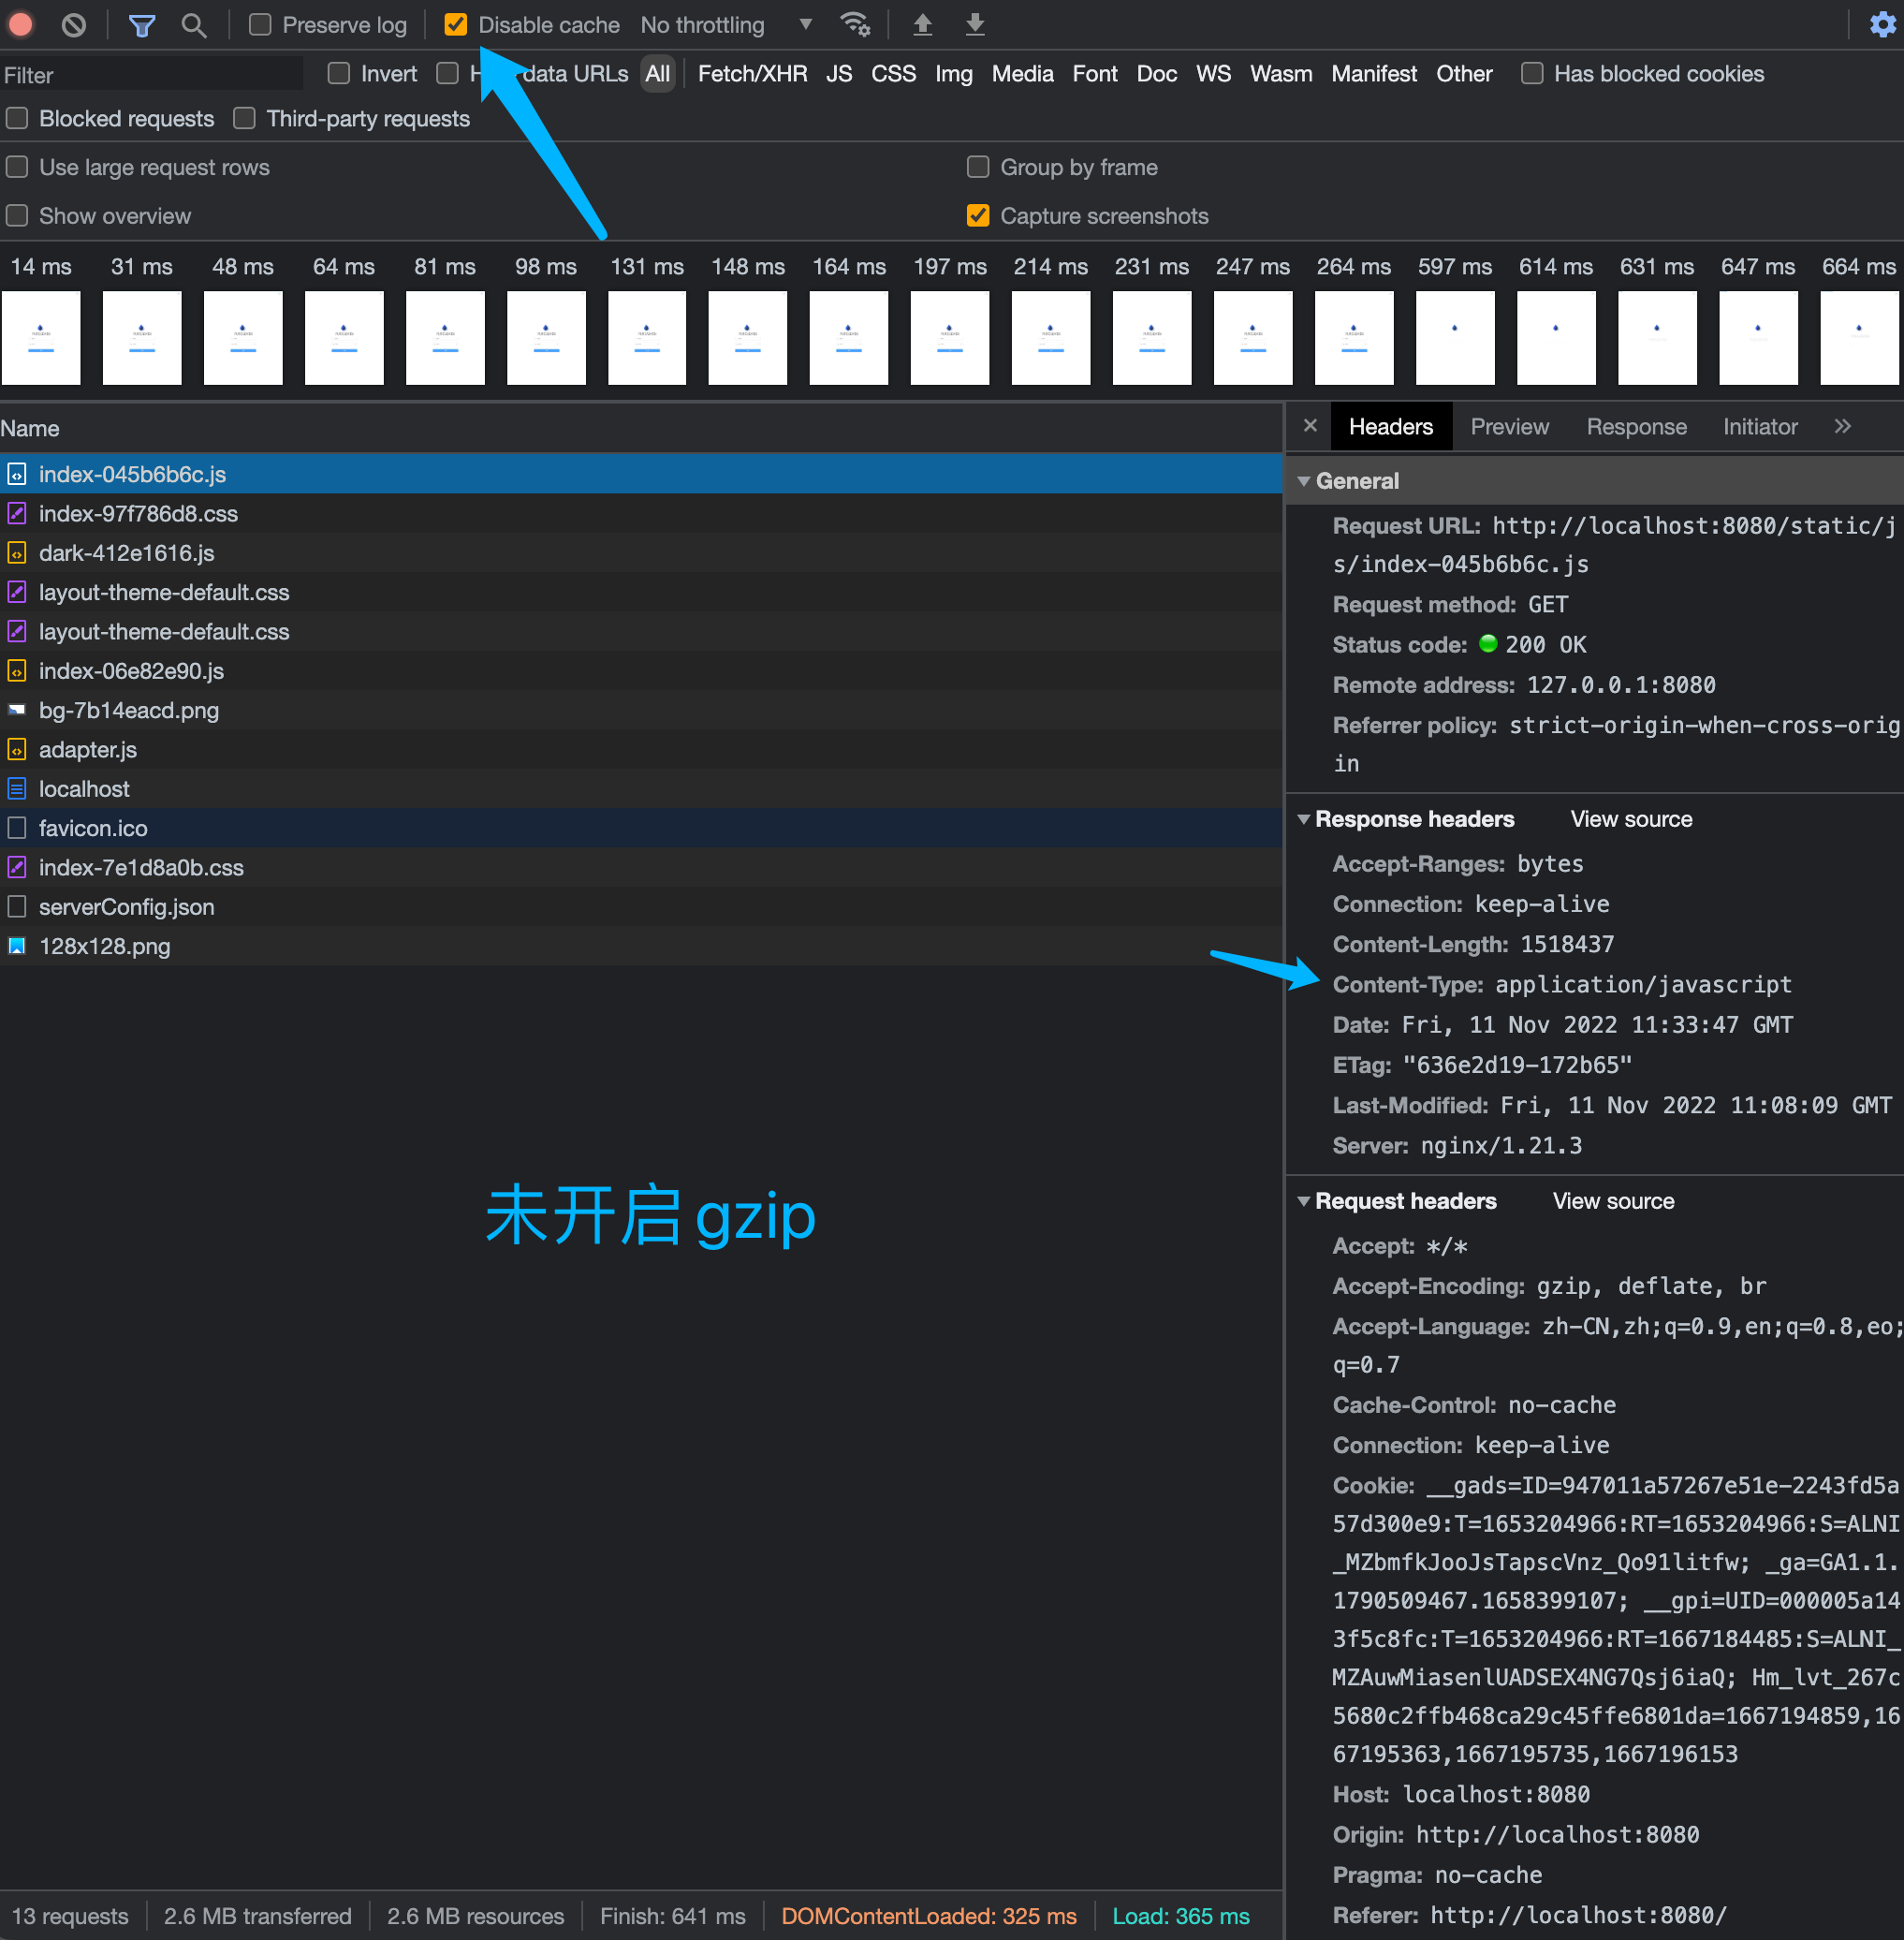
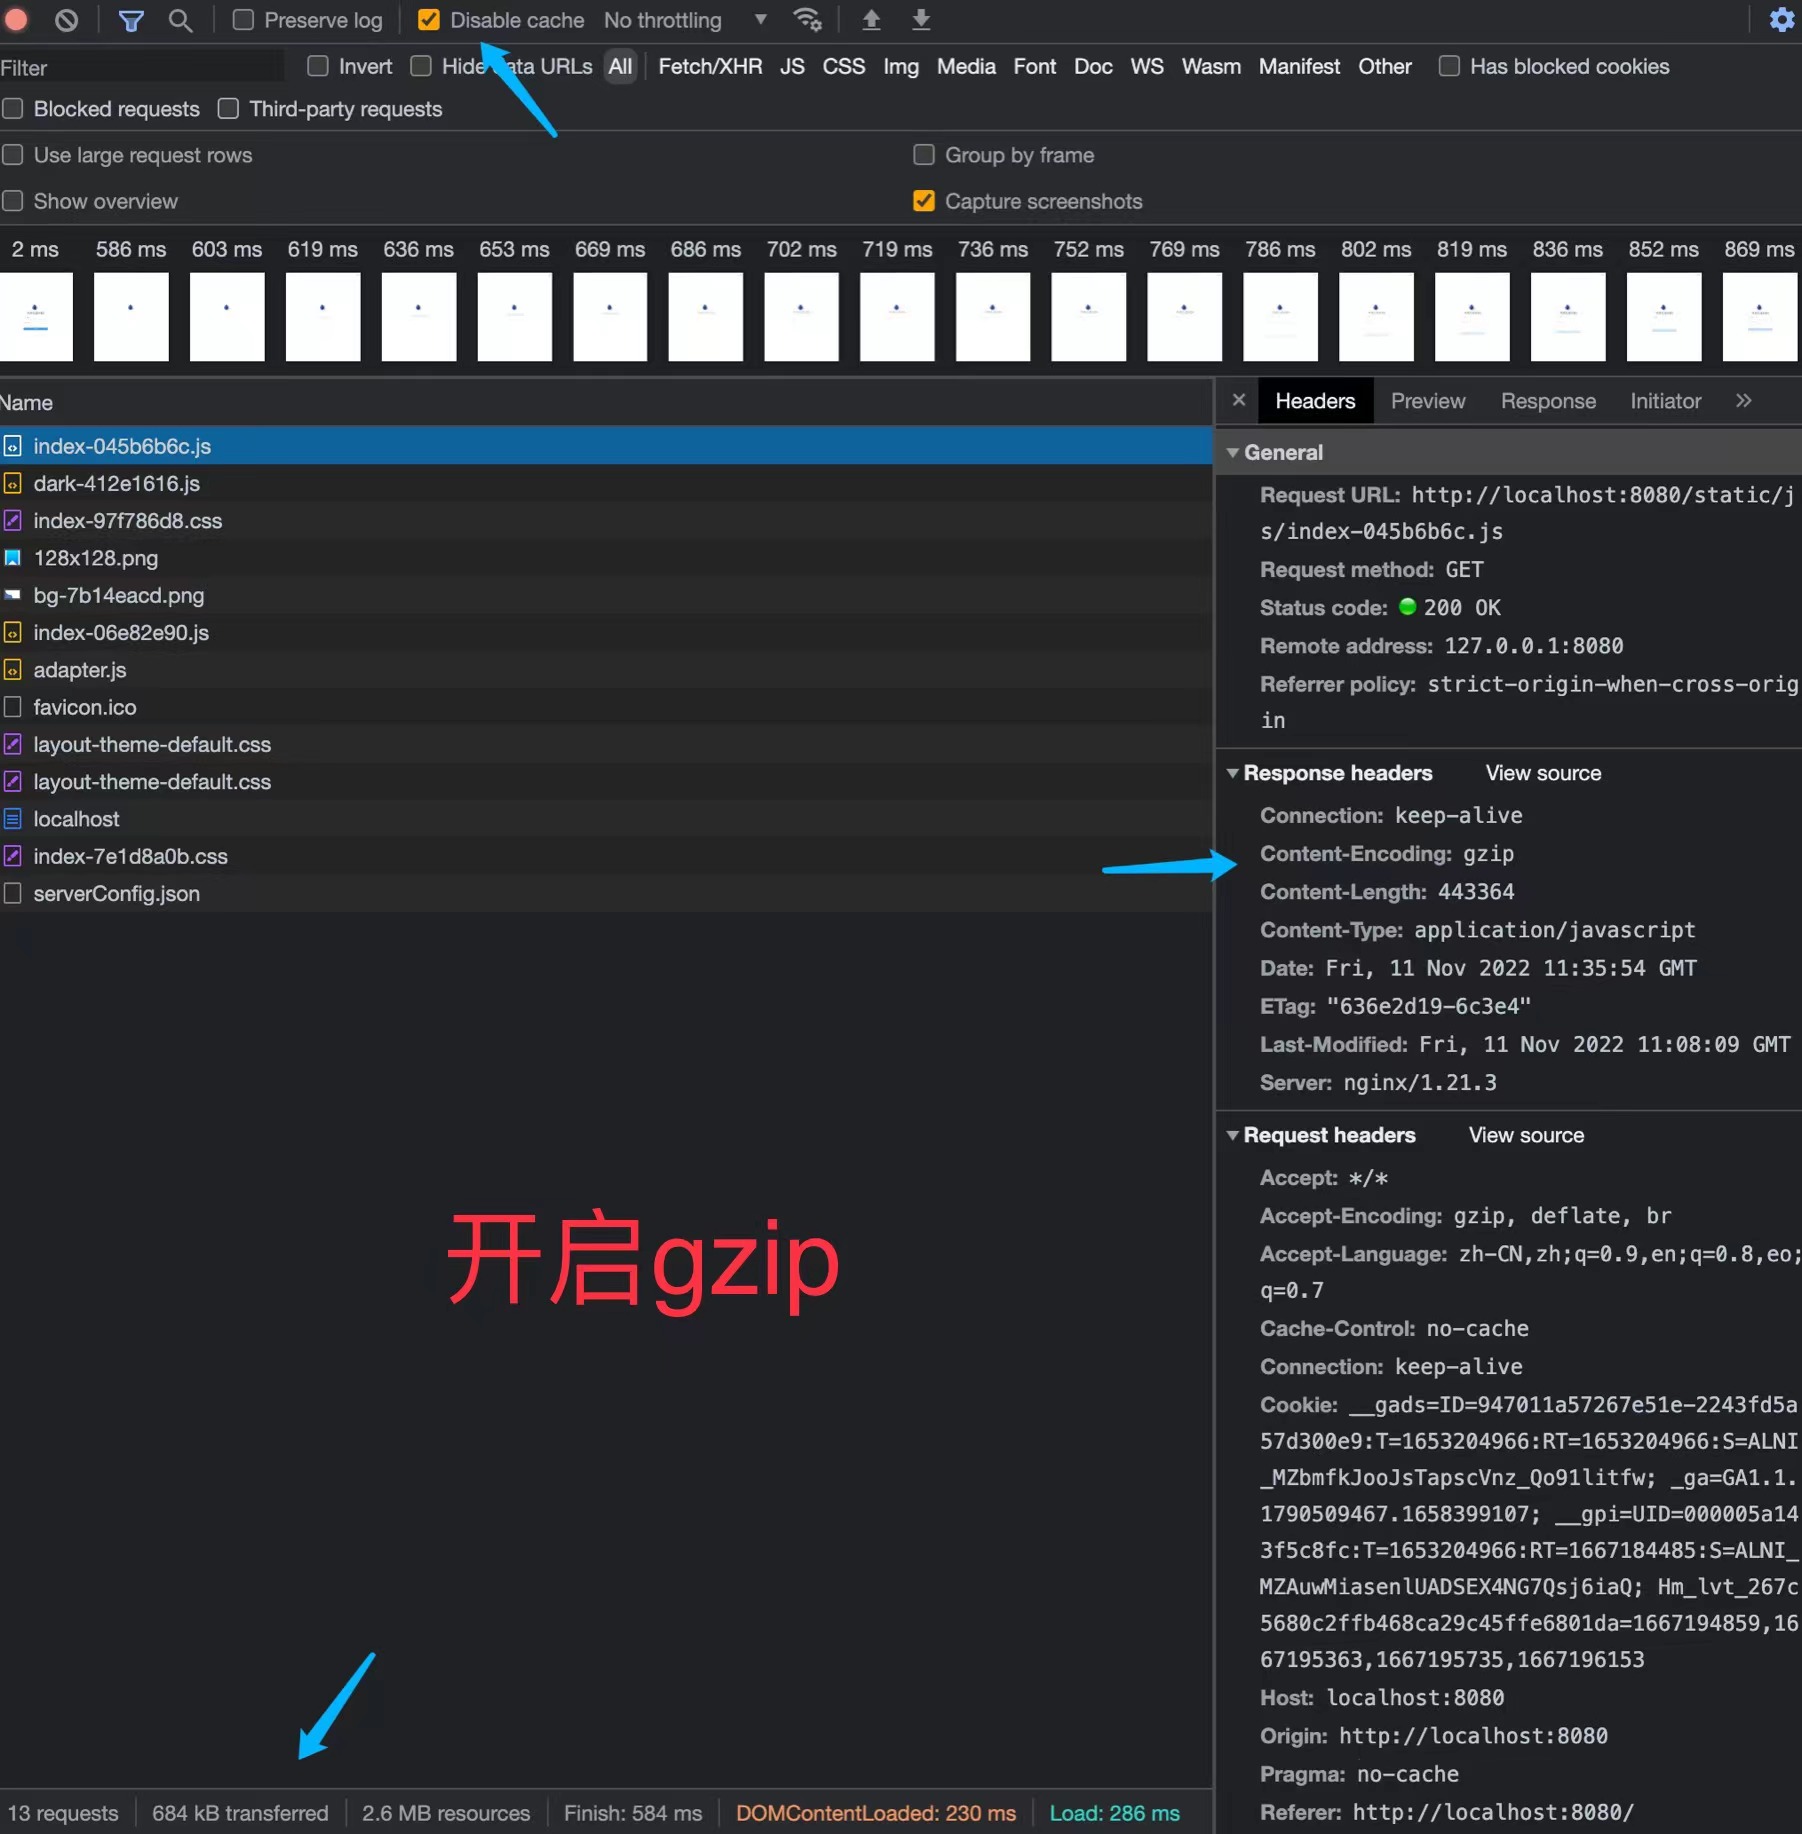
下面两张图是平台非国际化精简版开启 gzip 前后对比
未开启 gzip(资源大小 2.6MB)
开启 gzip(资源被压缩,大小 684kb,比未开启时少了约 2MB 🐮)
# nginx 常用命令
# 启动 nginx
sudo nginx
# 重启 nginx
sudo nginx -s reload
# 停止运行 nginx
sudo nginx -s stop
# 判断 nginx.config 配置文件语法是否正确
常用于当您配置 nginx.config 文件保存重启后却不生效时
sudo nginx -t
当出现 ok、successful 的字眼时说明配置文件语法没问题
